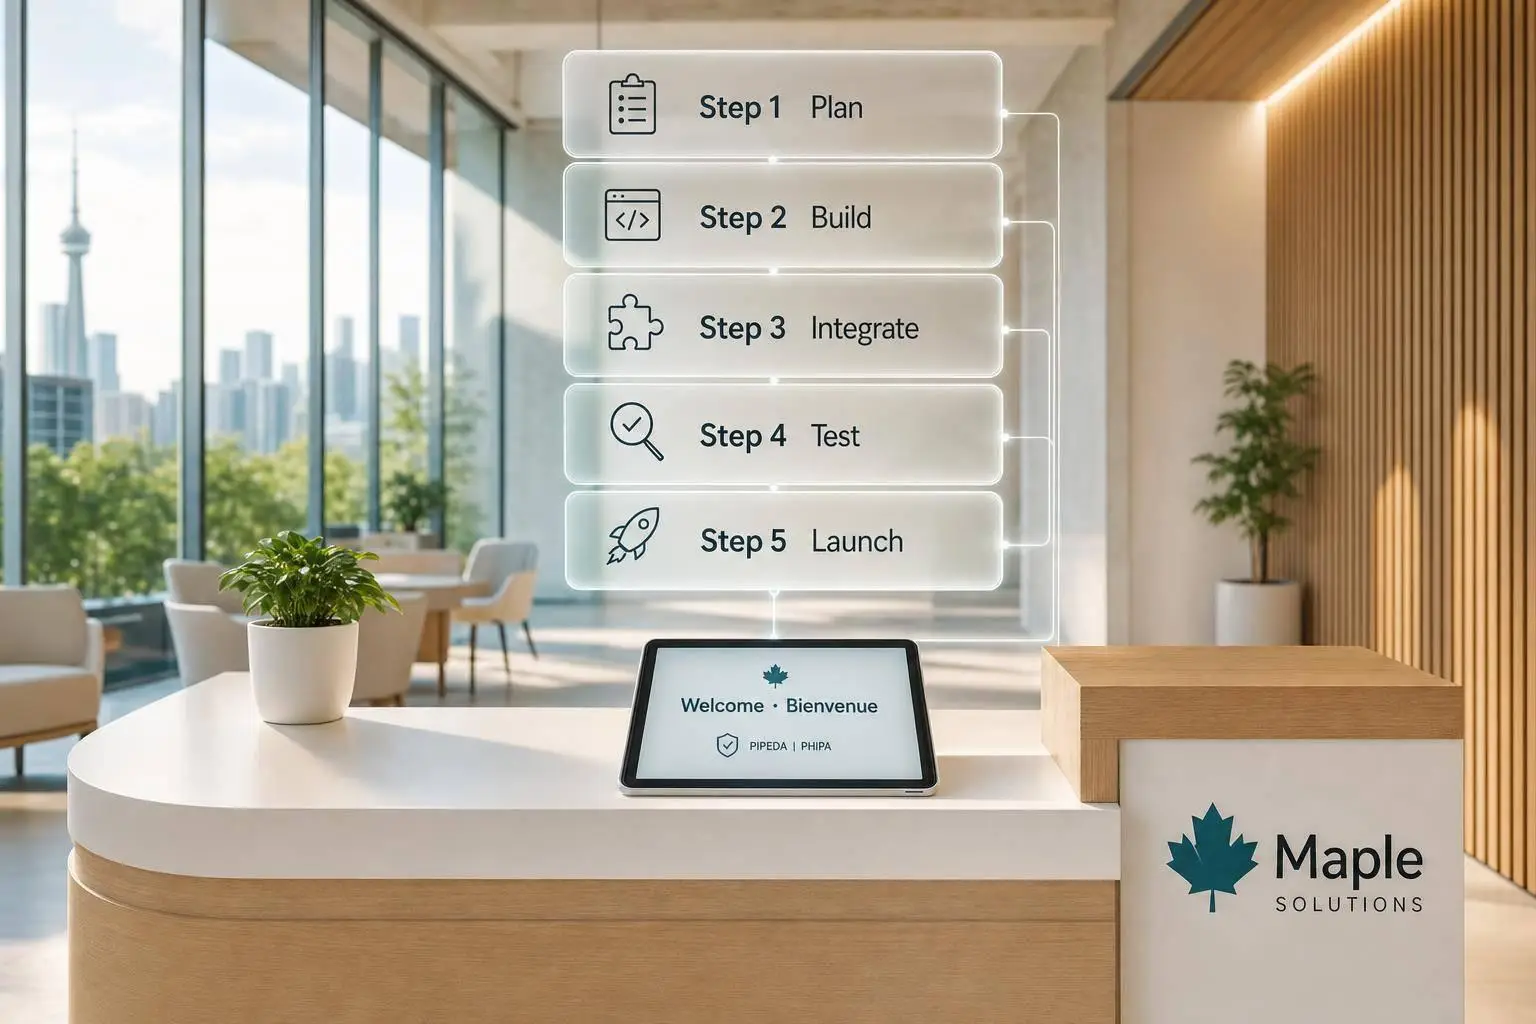
Checklist for Implementing Object Tracking in Retail
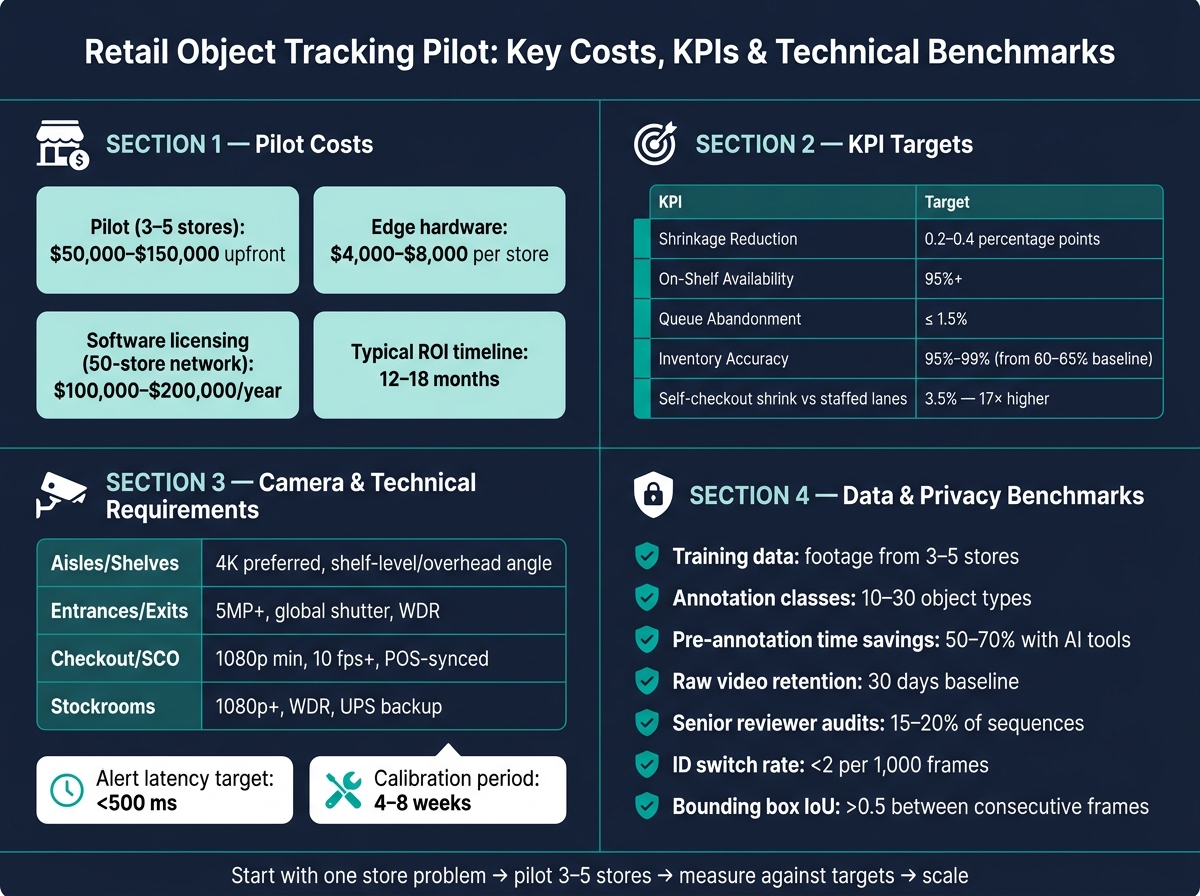
If I were planning retail object tracking, I’d start with one rule: pick one store problem first, then test whether the site, system, data, and privacy controls can support it. That matters because a 3–5-store pilot can cost $50,000–$150,000, edge hardware can run $4,000–$8,000 per store, and self-checkout shrink can be 3.5% – 17 times higher than staffed lanes.
Here’s the short version of what I’d check before rollout:
- Use case: define the object, zone, and business metric
- Targets: set clear goals like 95%+ on-shelf availability, ≤ 1.5% queue abandonment, or a 0.2–0.4 percentage-point shrink drop
- Cameras and store conditions: confirm 1080p minimum, 4K for shelves, 10 fps+ where motion matters, plus lighting and glare checks
- System and integrations: test model accuracy in-store, keep alert latency under 500 ms, and connect to POS, ERP, and reporting tools
- Data and privacy: train on footage from 3–5 stores, set annotation rules, review data quality, post signage, control access, and set retention such as 30 days for raw video
In plain terms, this checklist is about making sure the pilot can work in a live Canadian store – not just in a demo. I’d use it to keep scope tight, costs clear, and rollout risks under control.
Retail Object Tracking Pilot: Key Costs, KPIs & Technical Benchmarks
Building a Custom Retail Tracking System with YOLOv12 & SORT Tracker
sbb-itb-fd1fcab
1. Define the Tracking Use Case and Success Metrics
Start with one problem before you buy cameras or software licences. That sounds simple, but it saves a lot of wasted time and spend.
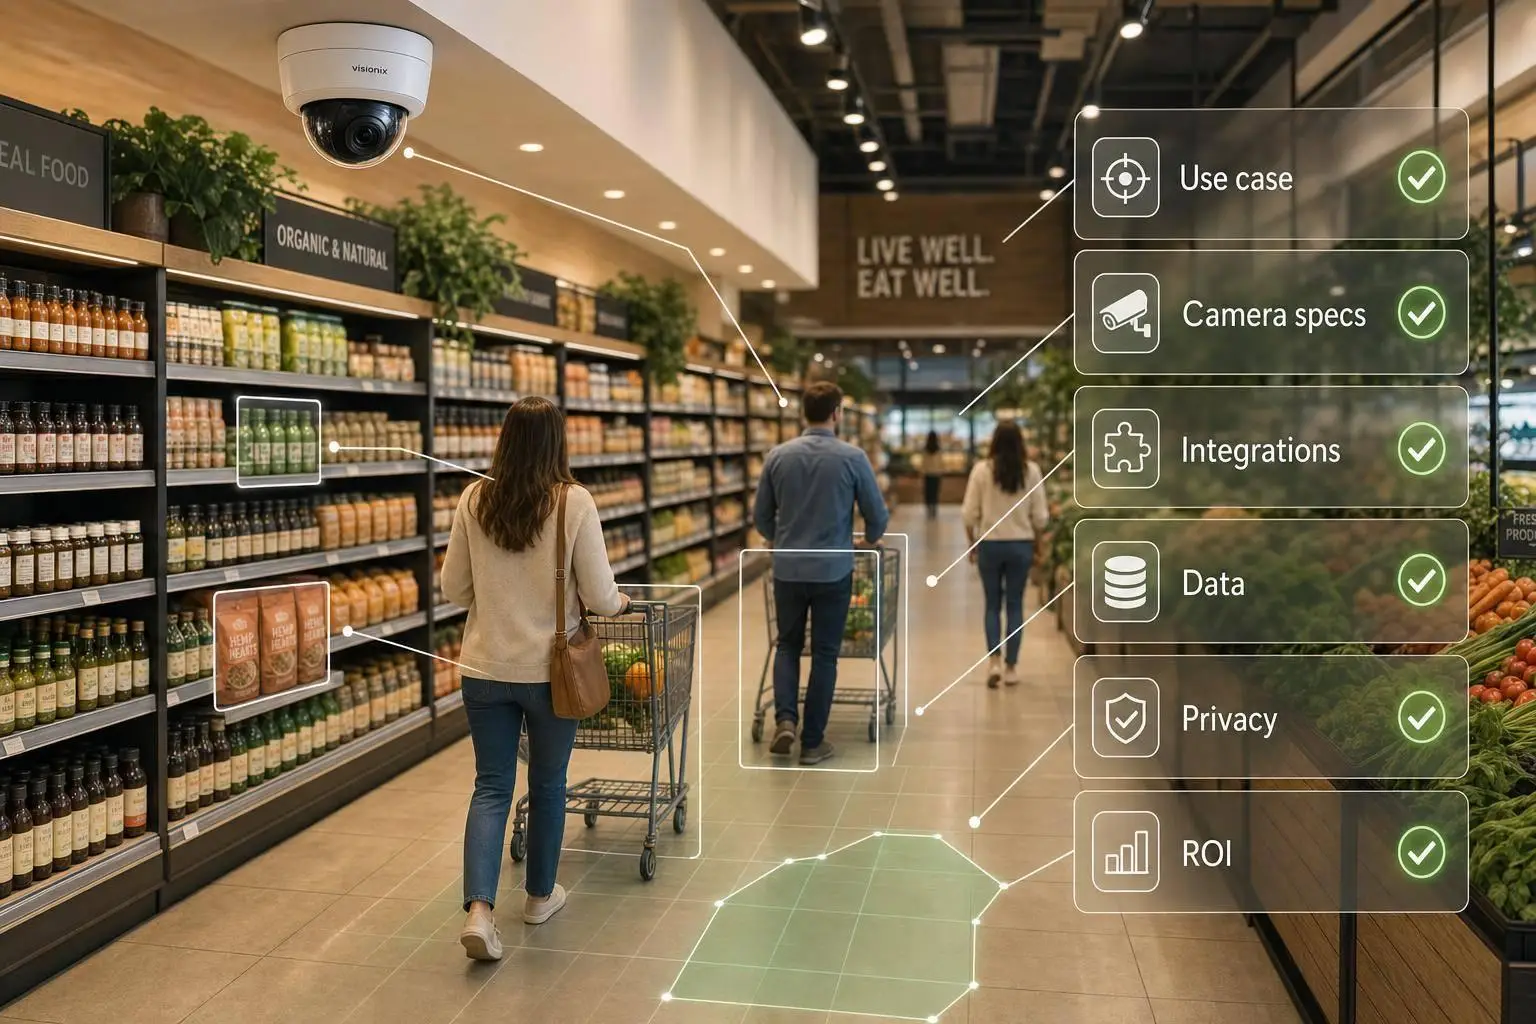
Use that problem to pin down three things before any technical work begins:
- the object
- the zone
- the metric
That might mean self-checkout shrink at the 10 highest-loss locations, out-of-stock rates in one high-velocity category, long checkout queues, or planogram non-compliance.
Choose the Object, Zone, and Business Objective
Every deployment needs three choices upfront: what you’re tracking, where you’re tracking it, and why it matters to the business. Those choices shape every hardware, software, and data call that comes next.
Common starting zones include self-checkout lanes, high-value aisles, shelf-level product facings, and entrances or exits. Self-checkout is often the first zone for loss prevention. High-value aisles fit loss prevention and dwell-time analysis. Shelves matter most when on-shelf availability (OSA) or planogram compliance is the main issue.
The object class should fit the zone. Tracking people – customers and staff – makes sense for queue management and loss prevention. Tracking products – individual SKUs or shelf facings – fits inventory accuracy and OOS detection. Some deployments need both. Still, starting with one keeps the pilot easier to run.
Once the scope is locked, set the numbers that will show whether the pilot worked.
Set Measurable Targets and Budget Limits
When the use case is clear, set specific numbers, not vague aims. Targets might include a 0.2–0.4 percentage-point drop in shrinkage, 95%+ on-shelf availability, queue abandonment ≤ 1.5%, or inventory accuracy of 95%–99%. If the pilot is about people counting, set detection accuracy at 95% or higher and keep false alerts below one per camera per day.
| KPI | Target | Business Impact |
|---|---|---|
| Shrinkage Rate | 0.2–0.4 percentage-point reduction | Direct recovery of lost revenue |
| On-Shelf Availability | 95%+ accuracy | 3–5% sales lift in compliant categories |
| Queue Abandonment | ≤ 1.5% | Higher conversion and customer satisfaction |
| Inventory Accuracy | 95%–99% (from a 60–65% baseline) | Fewer stock discrepancies and labour hours lost |
Budget needs to be set early too. A 3–5-store pilot typically costs $50,000–$150,000 upfront. Edge compute hardware usually runs $4,000–$8,000 per store. Software licensing for a 50-store network can land at $100,000–$200,000 per year.
Set those figures before the pilot starts, not halfway through when the scope begins to drift.
Only after the scope and targets are fixed should you check camera and site conditions.
2. Check Camera, Lighting, and Store-Floor Conditions
Once your use case and targets are set, the next move is a physical audit of the store. Tie that audit back to the object, zone, and KPI you already picked. This matters because store-floor conditions can hurt demo results once the system goes live. Those limits should guide the camera requirements for each zone.
Check Camera Angle, Field of View, Frame Rate, and Resolution
Camera placement and specs need to fit both the object and the zone. Set the field of view wide enough to cover the area, but not so wide that the object becomes hard to identify. Overhead cameras are a good fit for traffic flow and queue management, while shelf cameras work better for inventory tracking.
For general tracking, the minimum resolution is 1080p. For shelf-level monitoring and SKU identification, 4K is the better choice. Legacy 480p cameras don’t meet the bar for modern retail tracking.
Frame rate starts to matter a lot when people or products move fast. You need at least 10 fps to track individual movement with some reliability and catch quick actions like item concealment. Drop below that, and motion blur starts to chip away at model accuracy. At entrances and checkout lanes, use global-shutter sensors and WDR to cut blur and deal with sharp lighting shifts.
| Zone | Recommended Resolution | Camera Angle | Key Requirement |
|---|---|---|---|
| Aisles / Shelves | 4K preferred | Shelf-level or overhead | Handles crowded shelves and SKU detail |
| Entrances / Exits | 5MP+ | Full-body / eye-level | Global-shutter; WDR for door lighting |
| Checkout / SCO | 1080p minimum | Overhead per lane | 10 fps+; synced with POS events |
| Stockrooms | 1080p+ | Overhead and side | WDR; UPS backup for power stability |
Camera shake is easy to miss, but it can throw off tracking over time. Stable mounting helps. So do software stabilisation filters. It’s also smart to plan for a 4–8-week calibration period after installation so you can tune shadow suppression and lighting filters.
Check Lighting, Glare, Occlusion, and Seasonal Changes
Lighting is one of the main reasons lab results fall apart in a live store. Entrances with backlighting can wash out silhouettes. Reflective packaging can trigger false negatives. Cooler doors with condensation can make SKUs harder to see.
Test each zone on its own. Lighting problems are usually local, not store-wide. Every zone has its own lighting profile, and each one needs testing before you lock in hardware choices.
Store changes can also push models off track. Holiday displays, temporary fixtures, and seasonal resets all create drift as the layout shifts. To keep up, build a quarterly retraining cadence into the deployment plan. Review cameras and layouts every three months using fresh footage. On top of that, schedule weekly lens cleaning so dust doesn’t slowly eat into image quality.
Once the site is stable, move to software and integration checks.
3. Confirm Software, Model, and Integration Readiness
With cameras in place and lighting sorted out, the next step is the software stack. This is the part that decides whether detection stays sharp, tracking holds steady, and system connections keep working when the store gets busy.
Verify Detection, Tracking, Latency, and Occlusion, Crowding, and Low-Light Handling
Once the camera feed is stable, test whether the model can handle actual store conditions. Use a detector with a multi-object tracker so identities stay stable from frame to frame. Even then, performance can slip in cluttered aisles or dim zones, where false positives and false negatives can land in the 4–8% range. The fix is simple in theory, but not always in practice: tune thresholds using live store footage, not lab clips.
Latency matters most when alerts need action right away. Queue alerts and self-checkout alerts should fire in under 500 milliseconds. That usually means an edge-first setup, where inference runs on-device and only metadata goes to the cloud. In plain terms, if the system has to wait on a distant server, it’s already too late. Size the edge hardware to match both the number of cameras and the latency target.
Use keypoint-based analytics when you need behaviour signals without collecting biometric data. That works well for tasks like pose estimation for SCO loss detection without collecting biometric identifiers.
Once detection and tracking are working, tie every alert to a store action. Track only the events the store can respond to, then link each one to a POS, inventory, or loss-prevention workflow. If an alert doesn’t lead to a clear next step, it can turn into noise pretty fast.
Plan Integration with POS, Inventory, and Reporting Tools
The system only starts pulling its weight when it connects to the tools your teams already use. For POS links, REST APIs or webhooks are the right fit. Batch uploads can add 8–24-hour delays, which gives theft patterns time to spread across locations without getting flagged.
For inventory and ERP platforms like SAP Retail, Oracle Retail, or Blue Yonder, the aim is a two-way flow. Planogram master data should feed into the model, while retail shelf optimization data should flow back into replenishment workflows. That back-and-forth is what turns camera output into something store teams can use.
| Integration Type | Common Systems | Purpose |
|---|---|---|
| POS | NCR Voyix, Oracle Micros, Square, Shopify | Conversion rates, SCO scan-sync, fraud detection |
| Inventory / ERP | SAP Retail, Oracle Retail, Blue Yonder, Relex | Planogram compliance, on-shelf availability |
| Workforce | UKG (Kronos), Legion, Reflexis | Queue-based staffing, labour optimisation |
| LP Case Management | Appriss Retail, Zendesk, ServiceNow | Investigation workflows, evidence attachment |
Expect 2–4 weeks per integration for the first store, with POS and inventory links usually driving most soft project costs. Use ONVIF Profile M to move metadata from edge devices into your VMS or analytics dashboards.
A practical split works best here:
- Use the edge for immediate alerts
- Use the cloud for trend analysis
- Keep raw video local for 30–90 days
- Send only metadata to the cloud
Next comes the part behind every alert and recording: the data rules and privacy controls.
4. Prepare Data Collection, Annotation, Validation, and Compliance
Collect Representative Data and Define Annotation Rules
Once the cameras are set and the model is ready, the next step is simple in theory but easy to get wrong in practice—this is where AI consulting services often focus on data integrity: build your training and validation set from live store footage.
That means store footage, not generic datasets pulled from somewhere else. If the system will run in your stores, it needs to learn from your stores. Fine-tune on footage from 3–5 stores with different formats, traffic levels, and lighting conditions. Include peak hours, quiet periods, and seasonal conditions so the data reflects layout shifts and day-to-day store changes.
For annotation, keep the taxonomy tight. A range of 10–30 classes is a good target, and ambiguous cases need to be spelled out early. That includes items like cart, basket, staff, customer, and any specific product types you plan to track. If you leave grey areas open to interpretation, label quality tends to drift fast.
A practical workflow looks like this:
- Box the keyframes
- Link IDs through occlusions
- Have a senior reviewer audit 15–20% of sequences
Model-assisted pre-annotation tools such as YOLO or Grounding DINO can cut labelling time by 50–70%. That said, speed means little if the draft labels are messy. The pre-annotations still need enough precision to make manual review workable instead of turning it into cleanup from scratch.
Occlusion rules also need to be locked in before annotation begins. Mark partial occlusions. Stop the box or mask on full occlusions. Keep the track ID in metadata, and reuse that ID if the object comes back within 30 frames.
Set Validation Thresholds, Privacy Controls, and Retention Policies
After annotation, validate the dataset before training or rollout. Start with automated consistency checks. These scripts catch mistakes that people often miss, especially in long sequences. For example, flag any object that jumps more than 50 pixels between frames, or any bounding box whose size changes by more than 50% without a clear reason such as perspective shift.
The table below covers the main quality-control benchmarks to check before rollout:
| Annotation Rule | Validation Criteria | Acceptance Threshold |
|---|---|---|
| Spatial Fit | Box-to-object boundary alignment | < 5% padding or clipping |
| Frame-to-Frame Consistency | IoU between consecutive frames | > 0.5 IoU |
| ID Persistence | ID switch rate per 1,000 frames | < 2 switches |
| Label Consistency | Label consistency across the full track | 0% class changes within a single track ID |
| Coverage | Annotated vs. visible objects | > 95% of visible objects tracked |
| Size Consistency | Frame-to-frame area change | < 50% jump unless a perspective shift explains it |
Once the dataset is clean, put the privacy and retention rules in place before deployment. Complete a privacy impact assessment, define the purpose of the system, and keep use tied to that purpose. In Canada, retailers should also post clear signage at entrances that explains the purpose of the tracking and gives people a contact for questions or access requests.
Access to store footage should be restricted by role, stored securely, and checked through monthly access-log reviews. Footage should be deleted once the stated purpose has been met. Retention periods also need to be set up front, and 30 days is a common baseline for raw video. For analytics use cases, convert images into metadata and delete the raw frames as soon as processing finishes. People must also be able to request access to their images, so the system should be able to return that footage while masking other individuals in the same frame.
Conclusion: Final Deployment and Monitoring Checklist
This final checklist is about one thing: launch readiness. Not just whether the system is installed, but whether it’s ready for a pilot in a live store.
| Checklist Category | Key Items to Confirm |
|---|---|
| Use-Case Sign-Off | Single problem defined, success metrics agreed, stakeholder buy-in secured |
| Infrastructure | Camera placement, resolution, angles, and occlusion points confirmed |
| Software & Integration | POS and inventory/ERP pipeline tested; alert triggers active; latency within target |
| Data & Validation | Representative data validated; annotation rules locked; feedback loop active |
| Privacy & Compliance | De-identified tracking outputs; compliance review complete; retention policies active |
For the pilot, use 3–5 stores with different traffic patterns, lighting conditions, and store formats over 8–12 weeks. That mix matters. A system that works in one clean, predictable location can fall apart in a busier or less controlled setting.
Bring store operations staff in from day one. They shouldn’t just watch from the sidelines. They should help spot false positives and share real-time feedback through a staff review loop that keeps the system on track during early rollout.
After launch, track performance on a fixed schedule. Packaging changes, new SKUs, seasonal displays, and store resets can chip away at accuracy over time. Review the model every quarter using fresh footage, recalibrate for seasonal lighting shifts, and handle the model like a production system that needs scheduled maintenance.
Check ROI every month against the original target, whether that’s shrink reduction, out-of-stock recovery, or conversion lift. Retailers often report full ROI within 12–18 months of deployment. But there’s a catch: if staff ignore the alerts, the system doesn’t deliver business value.
FAQs
Which retail use case should I pilot first?
Start with shelf monitoring and out-of-stock (OOS) detection. It’s a smart first pilot because you can measure it, act on it, and tie it to clear ROI without much guesswork.
Run the pilot in 3–5 stores with different conditions for at least 8–12 weeks. That range matters. A small test in one perfect store won’t tell you much. You want stores with different traffic patterns, layouts, and staffing situations so you can see how the system performs in the messiness of day-to-day retail.
Track a small set of metrics that tell a clear story:
- Accuracy
- Adoption rate
- Correction rate
Also, compare the AI’s results with human audits. That side-by-side check helps you spot gaps early and see whether the system is finding issues staff would have missed, or missing ones people catch right away.
How do I know if my store cameras are good enough?
Check whether your cameras deliver clear, well-lit video, enough resolution to see activity at the shelf level, and smooth connection with your analytics system. For AI-powered retail analytics, 2.8–5 MP IP cameras with ONVIF Profile M support and PoE are usually the best fit.
If you’re still using older analog cameras, they can limit object tracking accuracy. Camera placement matters too. So does a stable, high-quality video stream, such as RTSP or RTMP.
What privacy steps are required in Canada?
In Canada, object tracking and video surveillance need to follow privacy laws that balance business needs with people’s privacy rights. That starts with clear notice before anyone enters a monitored area. People should know they’re being recorded, why the monitoring is in place, and who to contact if they have questions or want to make an access request.
Recordings should also be handled with care. Store them securely, limit access to authorised staff only, keep them only for as long as needed, and destroy them securely after that. It also helps to have a privacy policy in place, support access requests and complaints, and make sure any vendors you work with follow the same rules.